A couple of weeks ago, I wrote about finding a native Christmas tree to plant at the end of the season to benefit wildlife and improve the ecosystem in my backyard. Since then, I’ve come across more non-native container-grown and balled-and-burlapped Christmas trees than species that are native to Ohio.
With limited options, I started considering what it would take to grow my own Christmas tree.
Growing your own Christmas tree
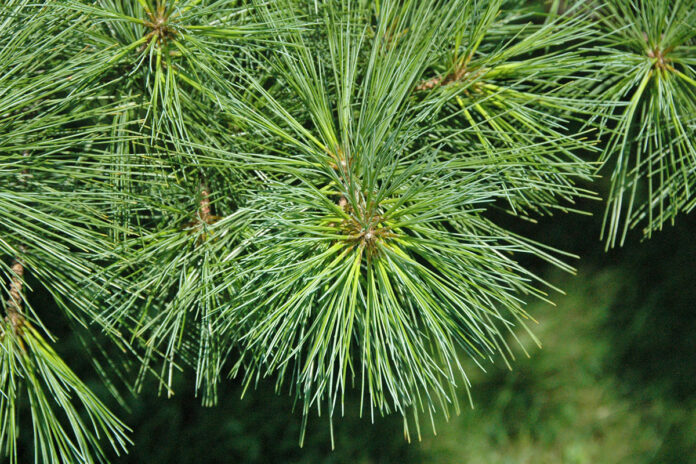
Selecting a species. Choose a Christmas tree species that is native to where you live. The only conifer commonly used for Christmas trees that is native to Ohio is the eastern white pine. It features clusters of long, flexible, needles that make it ideal to be used as a natural privacy border or windbreak. It also provides food and shelter for a variety of wildlife. White pines are the preferred nesting sites for many birds including woodpeckers, common grackles, mourning doves, chickadees and nuthatches. Black bears, rabbits, red squirrels and a variety of birds feed on white pine seeds. Beavers, snowshoe hares, porcupines, rabbits and mice feed on white pine bark.
Appearance. White pines are widely used as Christmas trees because they naturally grow in an oval or pyramid shape. They have soft, slender blue-green needles that sometimes reach 5 inches long and grow in bundles of five. They produce elongated brown cones that reach 3-5 inches long with smooth scales and a slight curve.
Growth rate. White pines grow quickly, adding about two feet of height per year. As they grow, they form an oval shape. Fully mature white pines can reach 50-80 feet tall with a spread of 20-40 feet. Growing a white pine tree from seed in optimal conditions, you could produce your own Christmas tree in about 5 years.
Growing preferences. White pines are hardy trees that have the ability to survive in a variety of conditions. However, they prefer moist, well-drained soils and full sun to partial shade conditions with at least four hours of direct unfiltered sunlight every day. They are also sensitive to air pollution, road salt and soil compaction. If you notice your white pine struggling in its first year, you can always choose a more suitable location as they transplant easily.
Planting white pine seeds
What you’ll need
- White pine seeds
- Paper bag
- Bucket
- Water
- Perlite
- 5-inch pots
- Horticultural sand
- Sphagnum moss
Steps (If you bought seeds instead of collecting your own, skip to step 3.)
- Collect white pine seeds by gathering white pine cones from late summer to early fall. Look for pine cones on the ground that haven’t completely opened and pine cones that are still attached to the tree and within reach. Pine cones that have completely dried out and lifted their scales won’t be the best source of viable seeds. Many of these pine cones dispersed their viable seeds before falling off the tree. You will have to collect a lot of pine cones to ensure you get some viable seeds.
- Dry the pine cones you collected in a large brown paper bag. Put the pine cones you’ve collected in a large paper bag and place the bag in a warm, dry location outdoors. Inside the bag, the pine cones will open and release their seeds. After about a week, shake the bag to encourage the seeds to drop to the bottom of the bag and then collect them.
- Soak your seeds in a bucket of water overnight to determine which ones are viable. The seeds that float to the surface are not viable and should be discarded. The seeds in the bottom of the bucket should be drained and saved to stratify.
- Stratify your seeds. Fill a freezer bag with moistened perlite and place your seeds inside. The bag of moistened perlite and white pine seeds should be stored in the refrigerator for 2-3 months. You’ll need to check the perlite periodically to make sure it’s moist. Whenever you notice it’s dry, spray water in the freezer bag to remoisten it.
- Prepare your pots and growing medium. Fill each pot with a 50-50 mixture of sand and sphagnum moss. Then completely wet each pot and allow excess water to drain.
- Plant one white pine seed in each container ¾ inch deep. Seeds should be planted horizontally and covered.
- Provide 1 inch of water per week as your seedlings grow.
- Keep the potting medium consistently moist. Water your seeds whenever the top inch of potting medium is dry to the touch. Your seeds will take around 6 weeks to germinate.
- Find a permanent home for your white pines. Once your seedlings have reached about 6 inches tall and are ready to be transplanted outside, find a location that supports their growing preferences and offers ample room for them to grow.
- Plant your seedlings. Seedlings should be planted about 20 feet apart. After planting, spread a 2-inch layer of mulch around the base of each one to protect their roots.
- Provide supplemental water during dry periods.


