I have been dabbling in a lot more gardening this year. I guess we’re all looking for things to do at home.
First, I was influenced by the expected seed shortage and jumped on a variety pack of seeds off Amazon to make sure I would have everything I needed in time to start seedlings. Then, I opened the package and discovered there were a lot of seeds I have never grown before. That inspired doubling the size of the garden and the creation of the overflow garden on the hill — I like to call it the bucket-baby garden. It’s where I’m putting all the things there’s no room for in the garden.
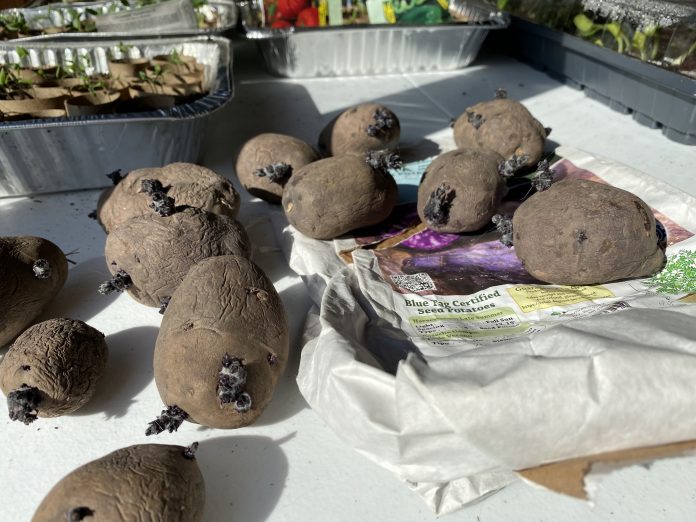
Recently, the gardening bug infected my dad and he bought some seed potatoes. So in addition to the garden and the overflow garden, we’re going to be planting a few rows of potatoes.
I’m pretty excited to have a project to do with my dad. I think the last time we shared a hobby was high school basketball. I want to make sure we have some success, so it’s at least worth trying again next year. The packaging the seed potatoes came in offered some planting and growing recommendations, but I want to make sure we give our seed potatoes their best chance from preparation through planting and growing to harvest, so I did some research.
Preparing seed potatoes to plant
A couple of weeks before planting seed potatoes a growing site and the seed potatoes themselves need to be prepared to ensure optimal growth.
Growing site. Potatoes require full sun for optimal growth, so pick a bed site with 6-8 hours or more of direct sunlight a day. Work fertilizer and compost into the soil to prepare for planting. Potatoes are aggressive rooting plants, so they produce their best crop in light, loose, well-drained, but moist soil.
Seed potatoes. Use certified seed potatoes as they are disease-free and have been selected to give you the best yields. A week or two before planting place your seed potatoes in a well-lit location where the temperature is regulated between 60-70 F to induce sprouting. A couple of days before planting you’ll cut your seed potatoes into sets. Each set should be cut approximately 1-2 inches square with a sharp, clean knife and contain at least one or two eyes or buds. Over the days prior to planting your sets will form a callous over the cuts. This thick calloused layer will prevent your sets from rotting after they are planted. Potatoes that are smaller than ping pong balls should be planted whole.
Planting and growing seed potatoes
You want to plant your potatoes outside two to four weeks prior to the last expected frost date in your area. You can determine this date using The Old Farmers Alamanac frost dates calculator.
When you are ready to plant, dig a trench about 4 inches wide and 6-8 inches deep in the growing site you previously prepared for your potatoes. Then, plant your sets 12-15 inches apart with the cut side facing down. Next, cover them with 3-4 inches of soil. After about two weeks, your potato sprouts will begin emerging and you’ll need to add another 3-4 inches of soil, filling in around the sprouts. If you have more than one trenched row of potatoes, you’ll need to space your rows 3 feet apart.
As your potato plants grow, your potatoes will form between the seed piece and the surface of the soil. That is why potatoes require periodic hilling to ensure developing potatoes aren’t exposed to sunlight. When your potato stems reach about 8 inches high pile enough dirt around the stems to bring the dirt level about halfway up the stem. Forming these small hills around the stems will keep your potatoes from pushing out of the ground.
In addition to periodic hilling, you’ll need to make sure your potatoes receive 1-2 inches of water a week to encourage optimum production.
Harvesting potatoes
When the foliage of your potato plants turns yellow discontinue watering and let the potato vines die back to the ground before harvesting. It will take about 2-3 weeks for the vines to die after the foliage turns yellow. Waiting to dig out the potatoes until the plant dies allows thick skins to form around the potatoes, which reduces peeling and bruising during harvest.


To prevent rotting, you can use sulfur or ashes on the cut pieces. Coat the pieces after cutting and let them “cure” for a few days before planting. Be careful to not damage or knock off the sprouts when handling the potatoe pieces.
a lot of advice on growing potatoes is extraneous; they pretty much grow whatever you do to them, even after they’ve been tilled under…ive been growing them in northeast Ohio since 1972 and never worry about cut side down; in fact, sprout side down is probably better if you’re prone to dry spells, cause the roots form from the sprout and hence would be deeper…i also cut them as i’m planting them without any failures, so waiting for them to callous over is also unnecessary..
they also overwinter quite well here, even in deep freezing, well below zero winters, so you can plant them anytime you want to, just as long as the site doesn’t get completely waterlogged..
Excellent advice
Potatoes are very resilient