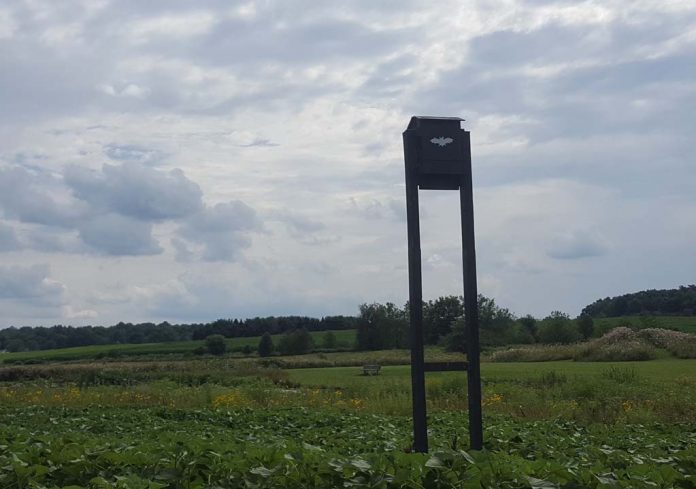
Before removing a colony of bats from your home, make sure you take the time to provide an alternate roost. Giving displaced bats somewhere to call home following exclusion protects them from long-distance displacement, extermination or a pre-existing colony in a new roost.
If they are constructed properly, bat boxes can serve as a place for mothers to raise their pups outside your home. By providing an alternate roost, you can help maintain the local bat population.
Introducing your bat box
Before being removed from their traditional roost, bats need to be familiarized with their new home.
- Install the bat box in their traditional roost in the winter or spring, and allow them to remain over the summer to investigate the new box.
- After you complete bat exclusion in the fall, remove the box and put it outside, but near your home. When the bats return next spring they won’t be able to reenter your home, but they will have the familiar box as an alternative.
If you can’t let the bats remain in your home for an additional summer, then install the bat box and bat-proof the house before the bats arrive in April. They may not move into the box right away, but at least they’ll have the option.
It may also help to scent the new box with the colony’s droppings because colonies identify their roosts partially by smell. Mix a cup of droppings with water and pour the mixture into the bat box. If you can’t scent the box, at least store it outside before installing it so the smell of new materials wears out.
Design

The most important things to consider when designing a bat box are size, interior construction and temperature control.
Size. It must be large enough to adequately house a maternity colony. You should decide what size you need based on the size of the colony you’re currently housing. Penn State Extension suggests following these parameters:
- Typically, bat boxes should be at least 7 inches deep, 24 inches wide, and either 12 or 24 inches tall.
- Bat boxes 12 inches in height will house up to 100 bats, and bat boxes 24 inches in height will house as many as 200 bats.
- If you need to house an even larger colony, you can join two boxes side-by-side, or you can install one large box that measures 14 to 21 inches deep.
Interior. Maternity colonies have unique requirements for their roosting chambers. It’s important to include the following elements in your bat box:
- Use baffles to divide the interior space into multiple roosting crevices.
- The crevices should measure from 0.75 inches up to 1.5 inches in depth, with most in the 0.75-inch to 1-inch range.
- All of the interior surfaces and the landing board below the box should be roughened to provide footholds for bats.
Temperature. You want to build a bat box that will provide high incubation temperatures for pregnant females and growing pups, while offering cooler areas incase temperatures rise too high simultaneously. Staining your box dark brown or black will help your box absorb sunlight while cutting ventilation slits into the lower sides and front will help control interior temperature ranges.
Placement
Once you’ve built your bat box, you want to find a good location for it. You need to consider sunlight exposure, proximity to the colony’s traditional roost and height.
Sunlight exposure. Sunlight may be the most important thing to consider because of the importance of temperature. Penn State Extension suggests facing your bat box southeast or southwest so that it receives at least seven hours of direct sunlight during the spring and summer.
Proximity. Your bat box should be placed within 10 to 20 feet of the colony’s traditional roost. Try to avoid heavily trafficked areas or areas that droppings will be a problem.
Height. The bat box should be installed at least 10 to 15 feet off the ground with three feet of clearance underneath.
Maintenance
During the spring and summer when bats are present, bat boxes require no maintenance and should be left alone. They should never be disturbed during the day, especially, and should always be watched from a distance at night. Planting a ground covering underneath the box can help minimize disturbances.
In the fall and winter, when the bats have left the box to hibernate elsewhere, you can inspect it, make necessary repairs and remove old wasp nests.
If you decide you want to move the bat box farther from your home, you can do so gradually each year. When the bats are not present in the fall and winter you can move the box up to 20 yards per year.


